https://www.bilibili.com/video/BV1Sb411s7qa
P33~38
传统方式
上传的文件和访问的应用在同一台服务器上
依赖
使用 Commons-fileupload 组件
1
2
3
4
5
6
7
8
9
10
11
| <dependency>
<groupId>commons-fileupload</groupId>
<artifactId>commons-fileupload</artifactId>
<version>1.3.1</version>
</dependency>
<dependency>
<groupId>commons-io</groupId>
<artifactId>commons-io</artifactId>
<version>2.4</version>
</dependency>
|
jsp页面
1
2
3
4
| <form action="/user/fileupload1" method="post" enctype="multipart/form-data">
选择文件:<input type="file" name="upload" /><br/>
<input type="submit" value="上传" />
</form>
|
控制器
1
2
3
4
5
6
7
8
9
10
11
12
13
14
15
16
17
18
19
20
21
22
23
24
25
26
27
28
29
30
31
32
33
34
35
36
37
38
|
@RequestMapping("/fileupload1")
public String fileuoload1(HttpServletRequest request) throws Exception {
String path = request.getSession().getServletContext().getRealPath("/uploads/");
File file = new File(path);
if(!file.exists()){
file.mkdirs();
}
DiskFileItemFactory factory = new DiskFileItemFactory();
ServletFileUpload upload = new ServletFileUpload(factory);
List<FileItem> items = upload.parseRequest(request);
for(FileItem item:items){
if(item.isFormField()){
}else{
String filename = item.getName();
String uuid = UUID.randomUUID().toString().replace("-", "");
filename = uuid+"_"+filename;
item.write(new File(path,filename));
item.delete();
}
}
return "success";
}
|
测试上传后
在target/uploads中找到上传的文件
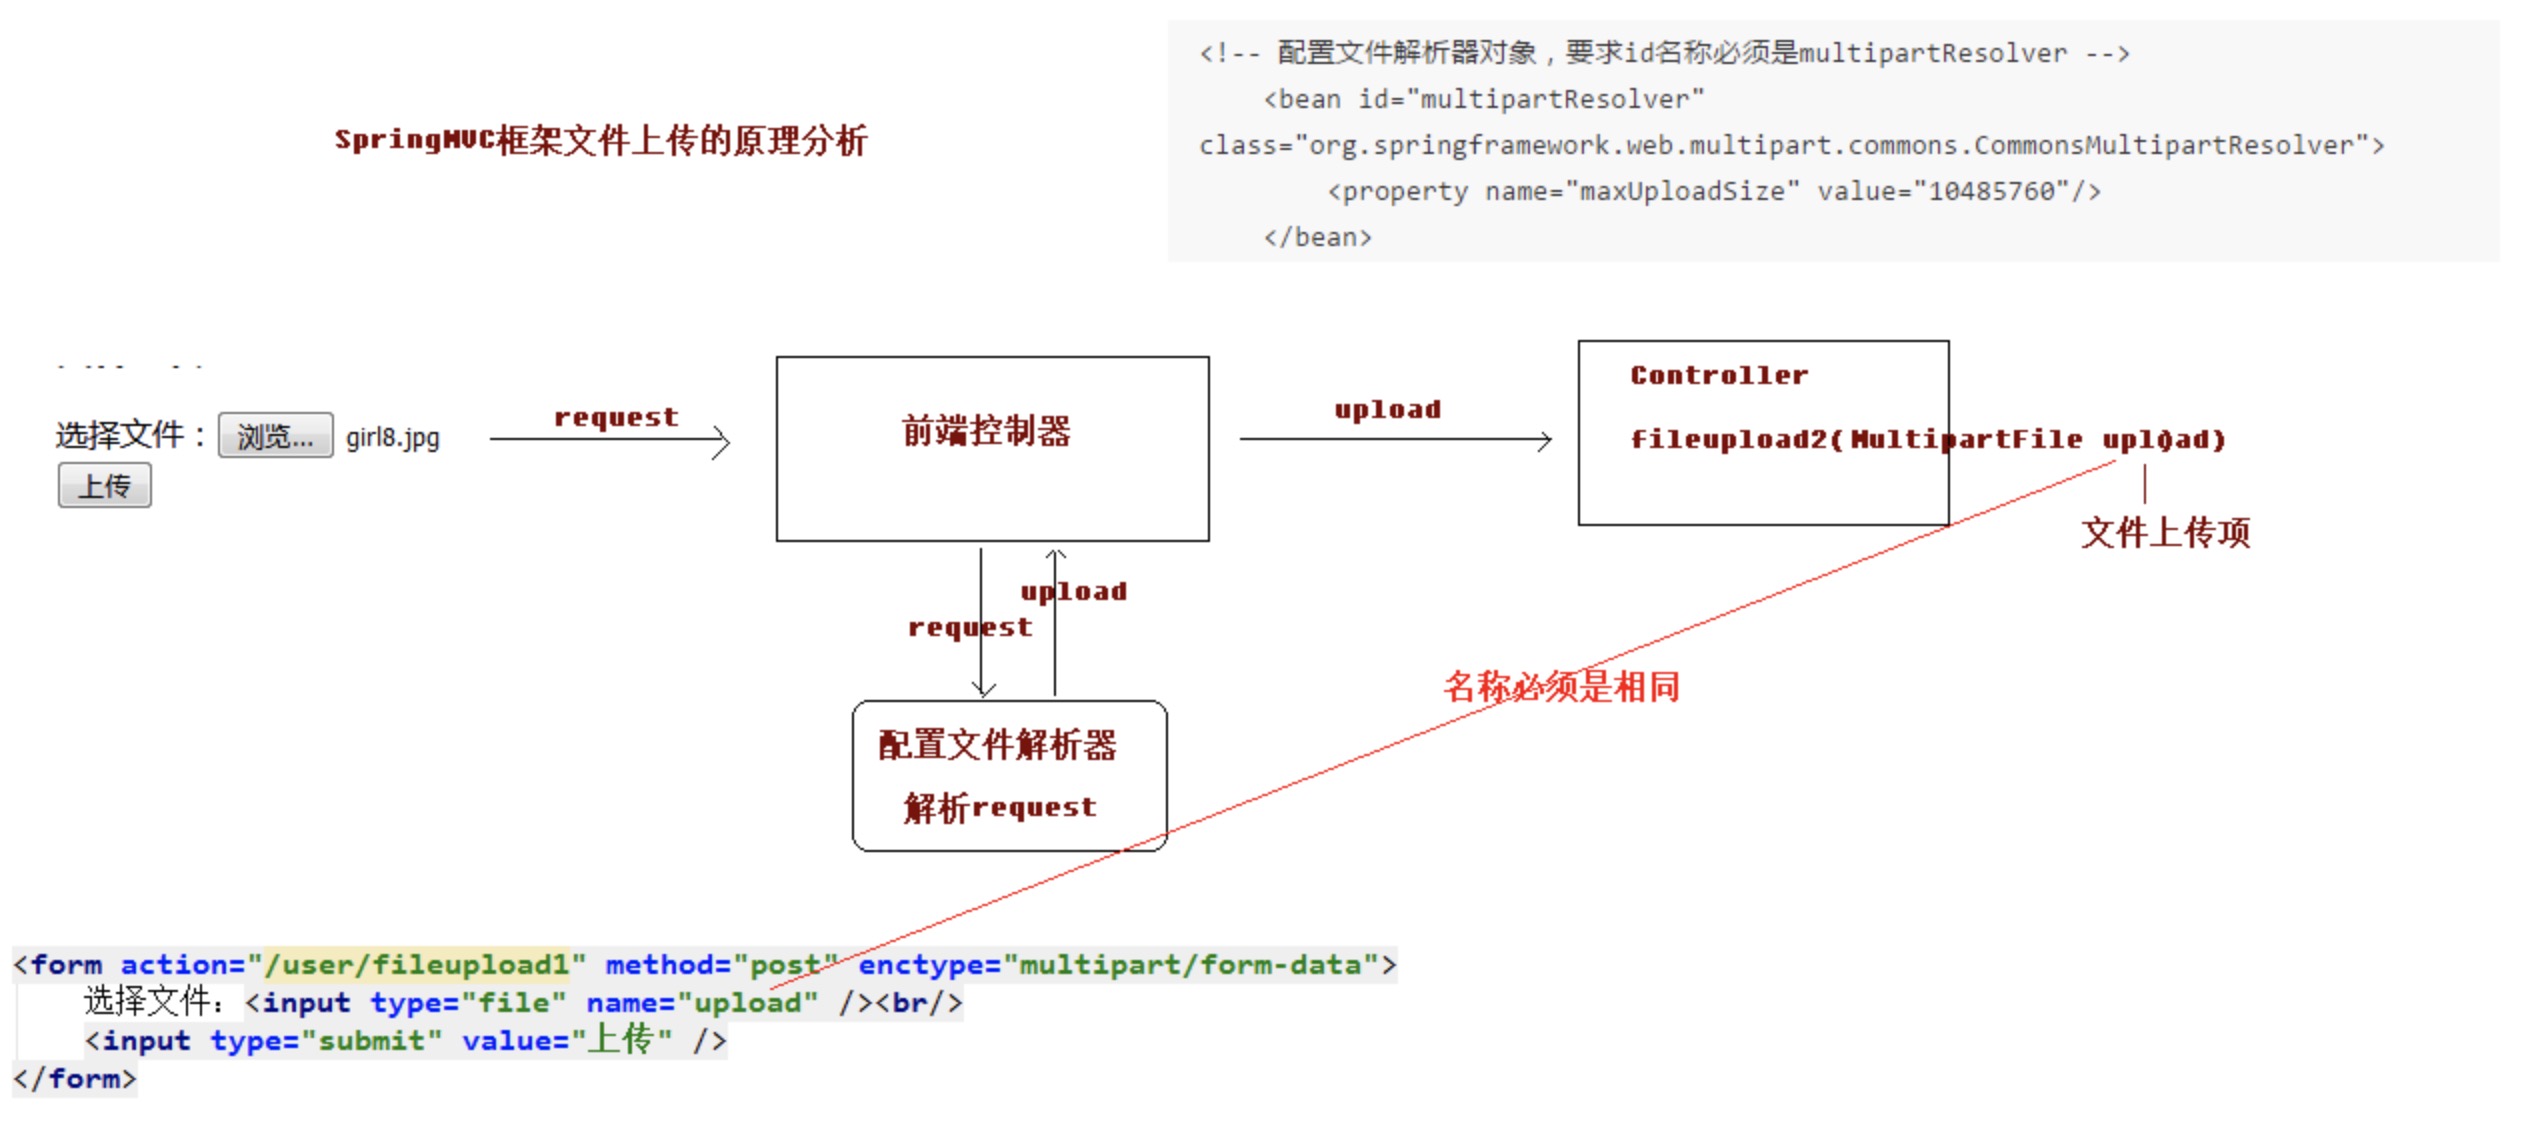
SpringMVC传统方式上传
原理分析

jsp页面
和传统方式一样
1
2
3
4
| <form action="/user/fileupload2" method="post" enctype="multipart/form-data">
选择文件:<input type="file" name="upload" /><br/>
<input type="submit" value="上传" />
</form>
|
配置文件解析器
spingmvc.xml中
1
2
3
4
|
<bean id="multipartResolver" class="org.springframework.web.multipart.commons.CommonsMultipartResolver">
<property name="maxUploadSize" value="10*1024*1024" />
</bean>
|
里面可以设置一些属性,如文件大小
控制器
1
2
3
4
5
6
7
8
9
10
11
12
13
14
15
16
17
18
19
20
21
22
| @RequestMapping("/fileupload2")
public String fileuoload2(HttpServletRequest request, MultipartFile upload) throws Exception {
String path = request.getSession().getServletContext().getRealPath("/uploads/");
File file = new File(path);
if(!file.exists()){
file.mkdirs();
}
String filename = upload.getOriginalFilename();
String uuid = UUID.randomUUID().toString().replace("-", "");
filename = uuid+"_"+filename;
upload.transferTo(new File(path,filename));
return "success";
}
|
相较传统方式,省了解析操作,简化上传步骤
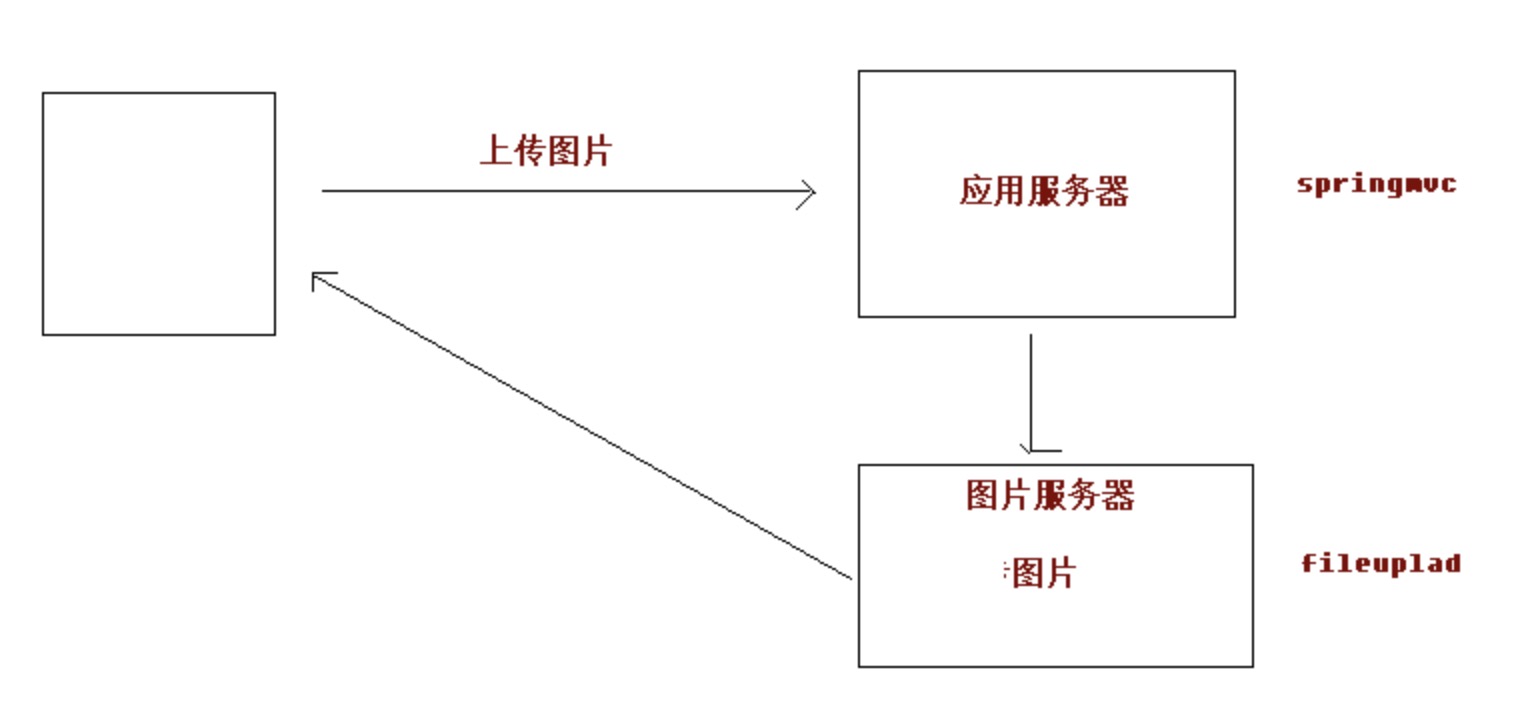
SpringMVC跨服务器上传
用2个tomcat服务器,文件服务器端口号此处用的9090
文件服务器
新建一个工程
在webapp下新建uploads文件夹用来存文件
启动
依赖
1
2
3
4
5
6
7
8
9
10
11
| <dependency>
<groupId>com.sun.jersey</groupId>
<artifactId>jersey-core</artifactId>
<version>1.18.1</version>
</dependency>
<dependency>
<groupId>com.sun.jersey</groupId>
<artifactId>jersey-client</artifactId>
<version>1.18.1</version>
</dependency>
|
jsp页面
仍没什么区别
1
2
3
4
| <form action="/user/fileupload3" method="post" enctype="multipart/form-data">
选择文件:<input type="file" name="upload" /><br/>
<input type="submit" value="上传" />
</form>
|
控制器
1
2
3
4
5
6
7
8
9
10
11
12
13
14
15
16
17
18
19
20
21
22
23
| @RequestMapping("/fileupload3")
public String fileuoload3(MultipartFile upload) throws Exception {
String path = "http://localhost:9090/uploads/";
String filename = upload.getOriginalFilename();
String uuid = UUID.randomUUID().toString().replace("-", "");
filename = uuid+"_"+filename;
Client client = Client.create();
WebResource webResource = client.resource(path + filename);
webResource.put(upload.getBytes());
return "success";
}
|
出现409异常可以手动创建一下uploads文件夹