Vue笔记04 分页
表格与分页
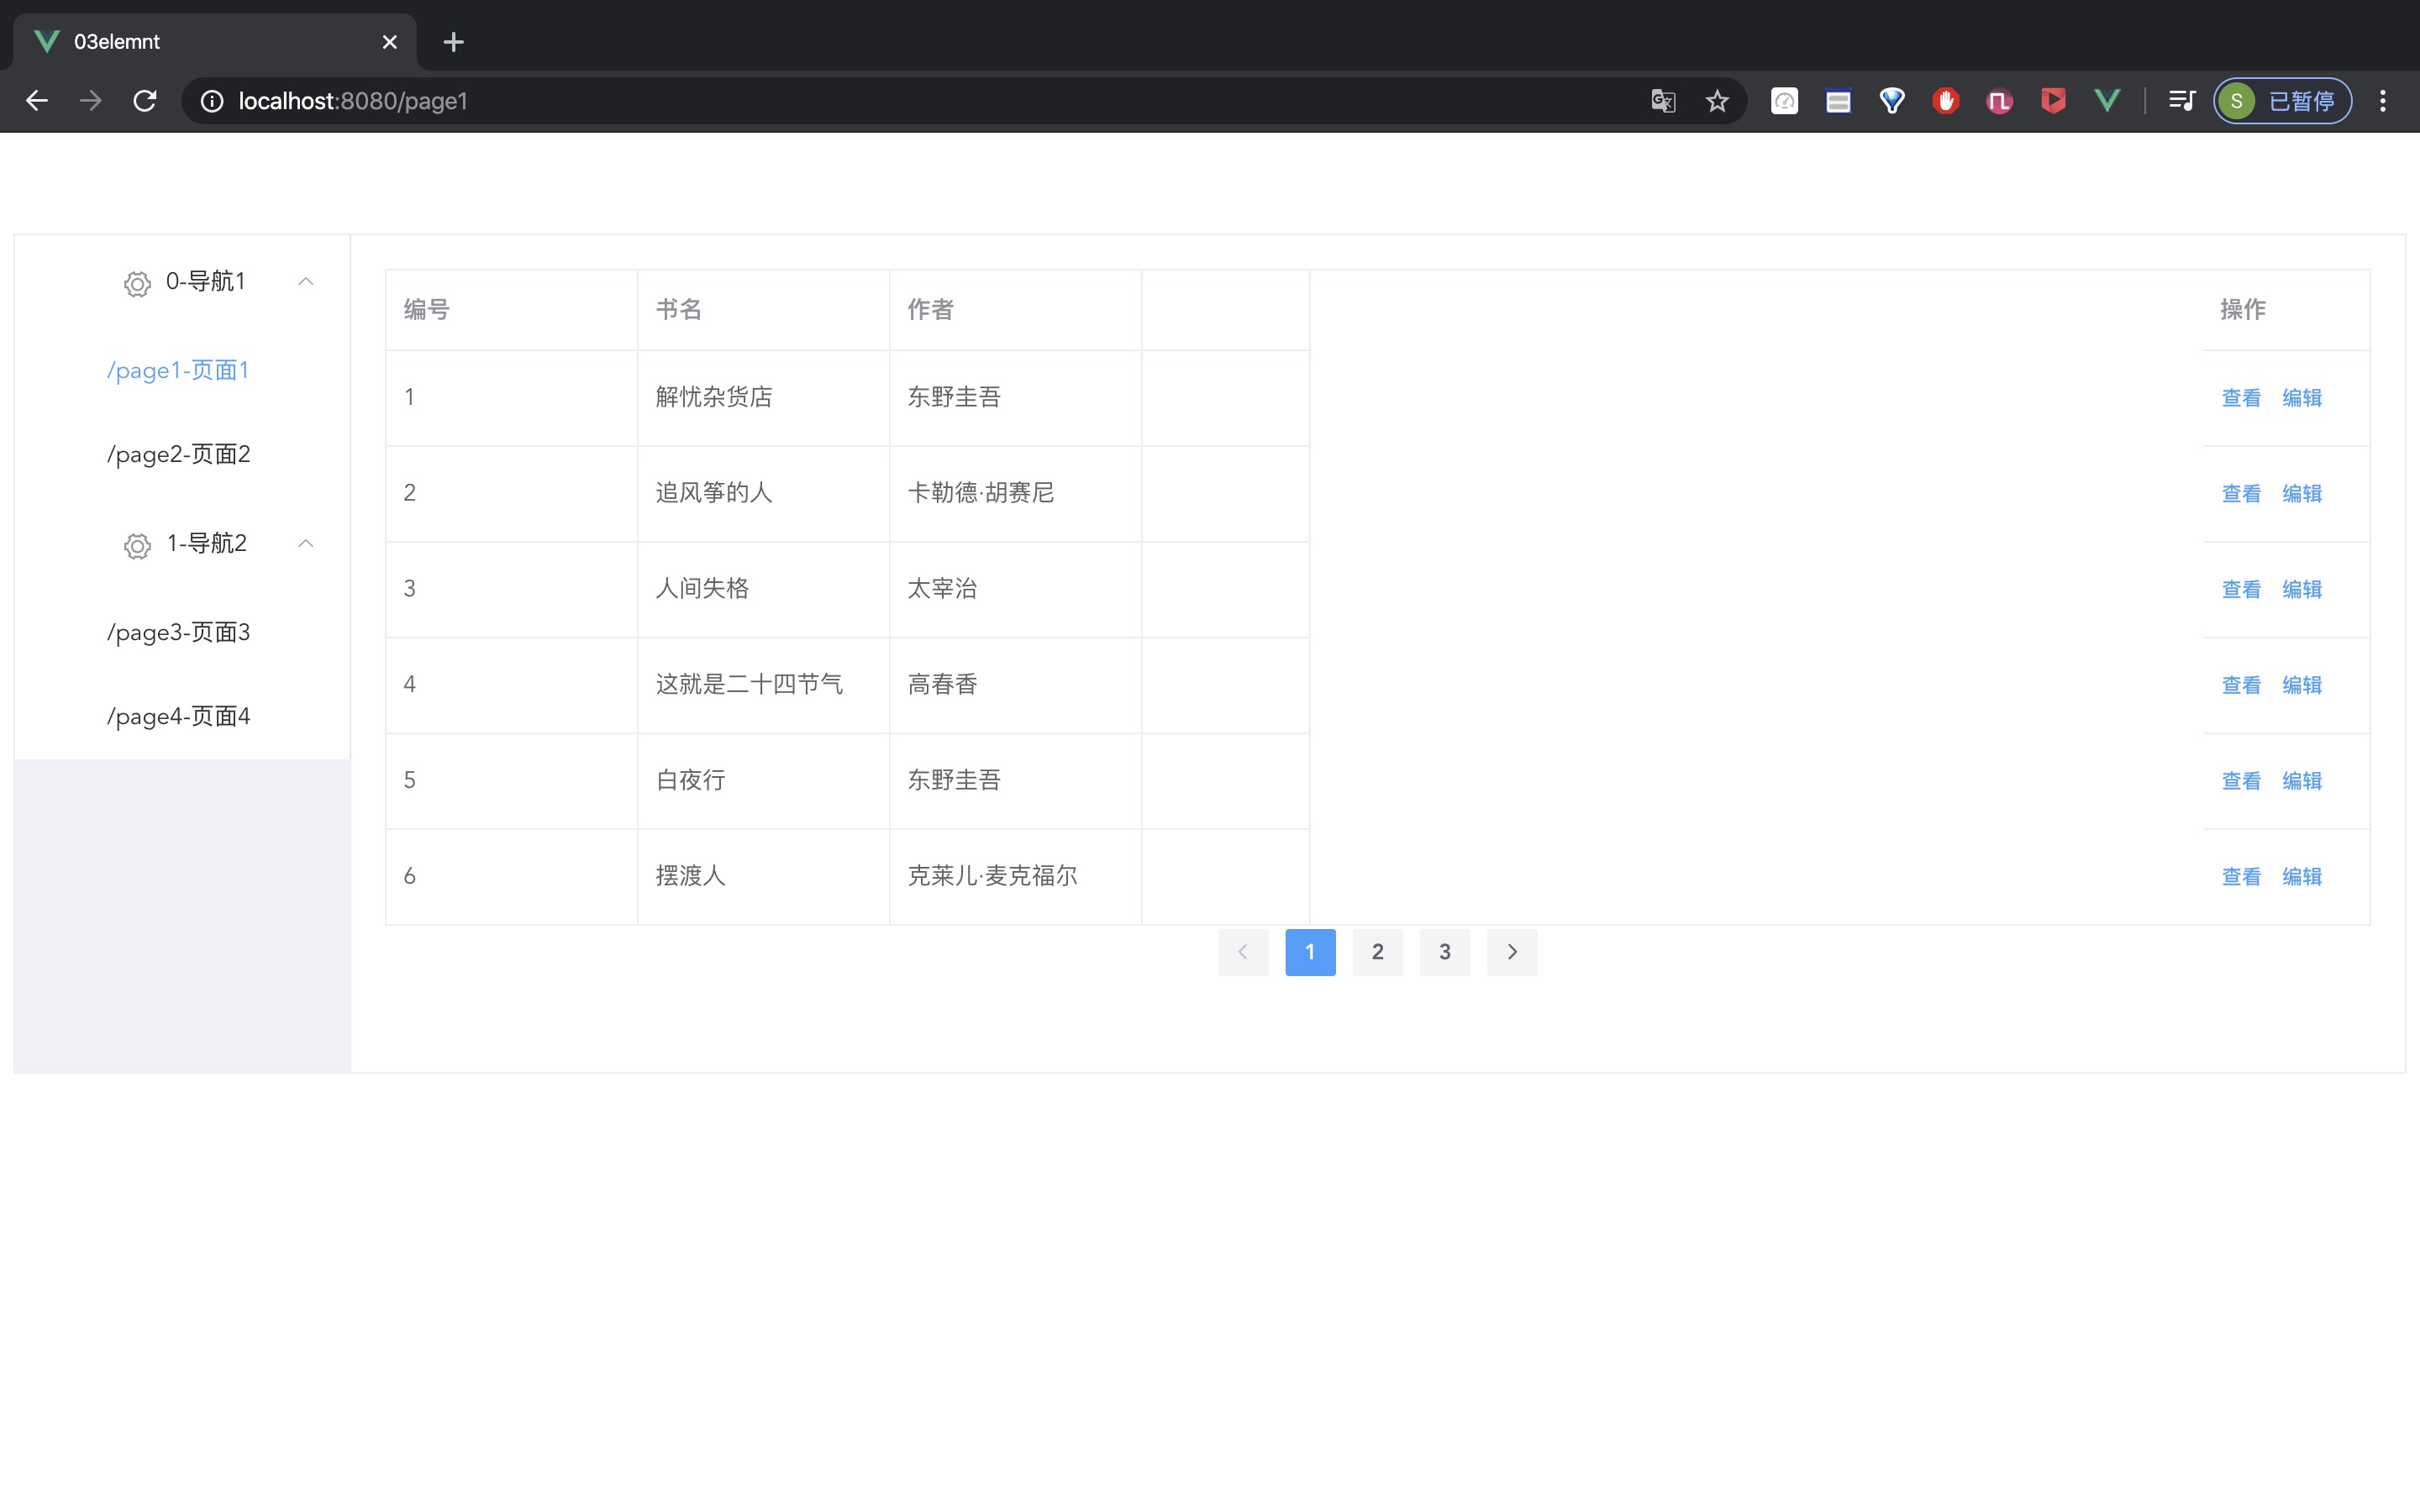
在上一次的基础上添加表格和分页,在官网拷过来,放在Page1
注意不能直接并列放在template下,由于只能有一个根节点,外面要套一个div
表格数据加载
1 | <el-table-column |
1 | tableData: [{ |
根据prop的值和数据对应
分页
1 | <el-pagination |
total是总记录数,默认每页10条,此时就有1000/10=100页
绑定点击事件
用@current-change=”page”
1 | <el-pagination |
Script中加
1 | <script> |
即可看到效果
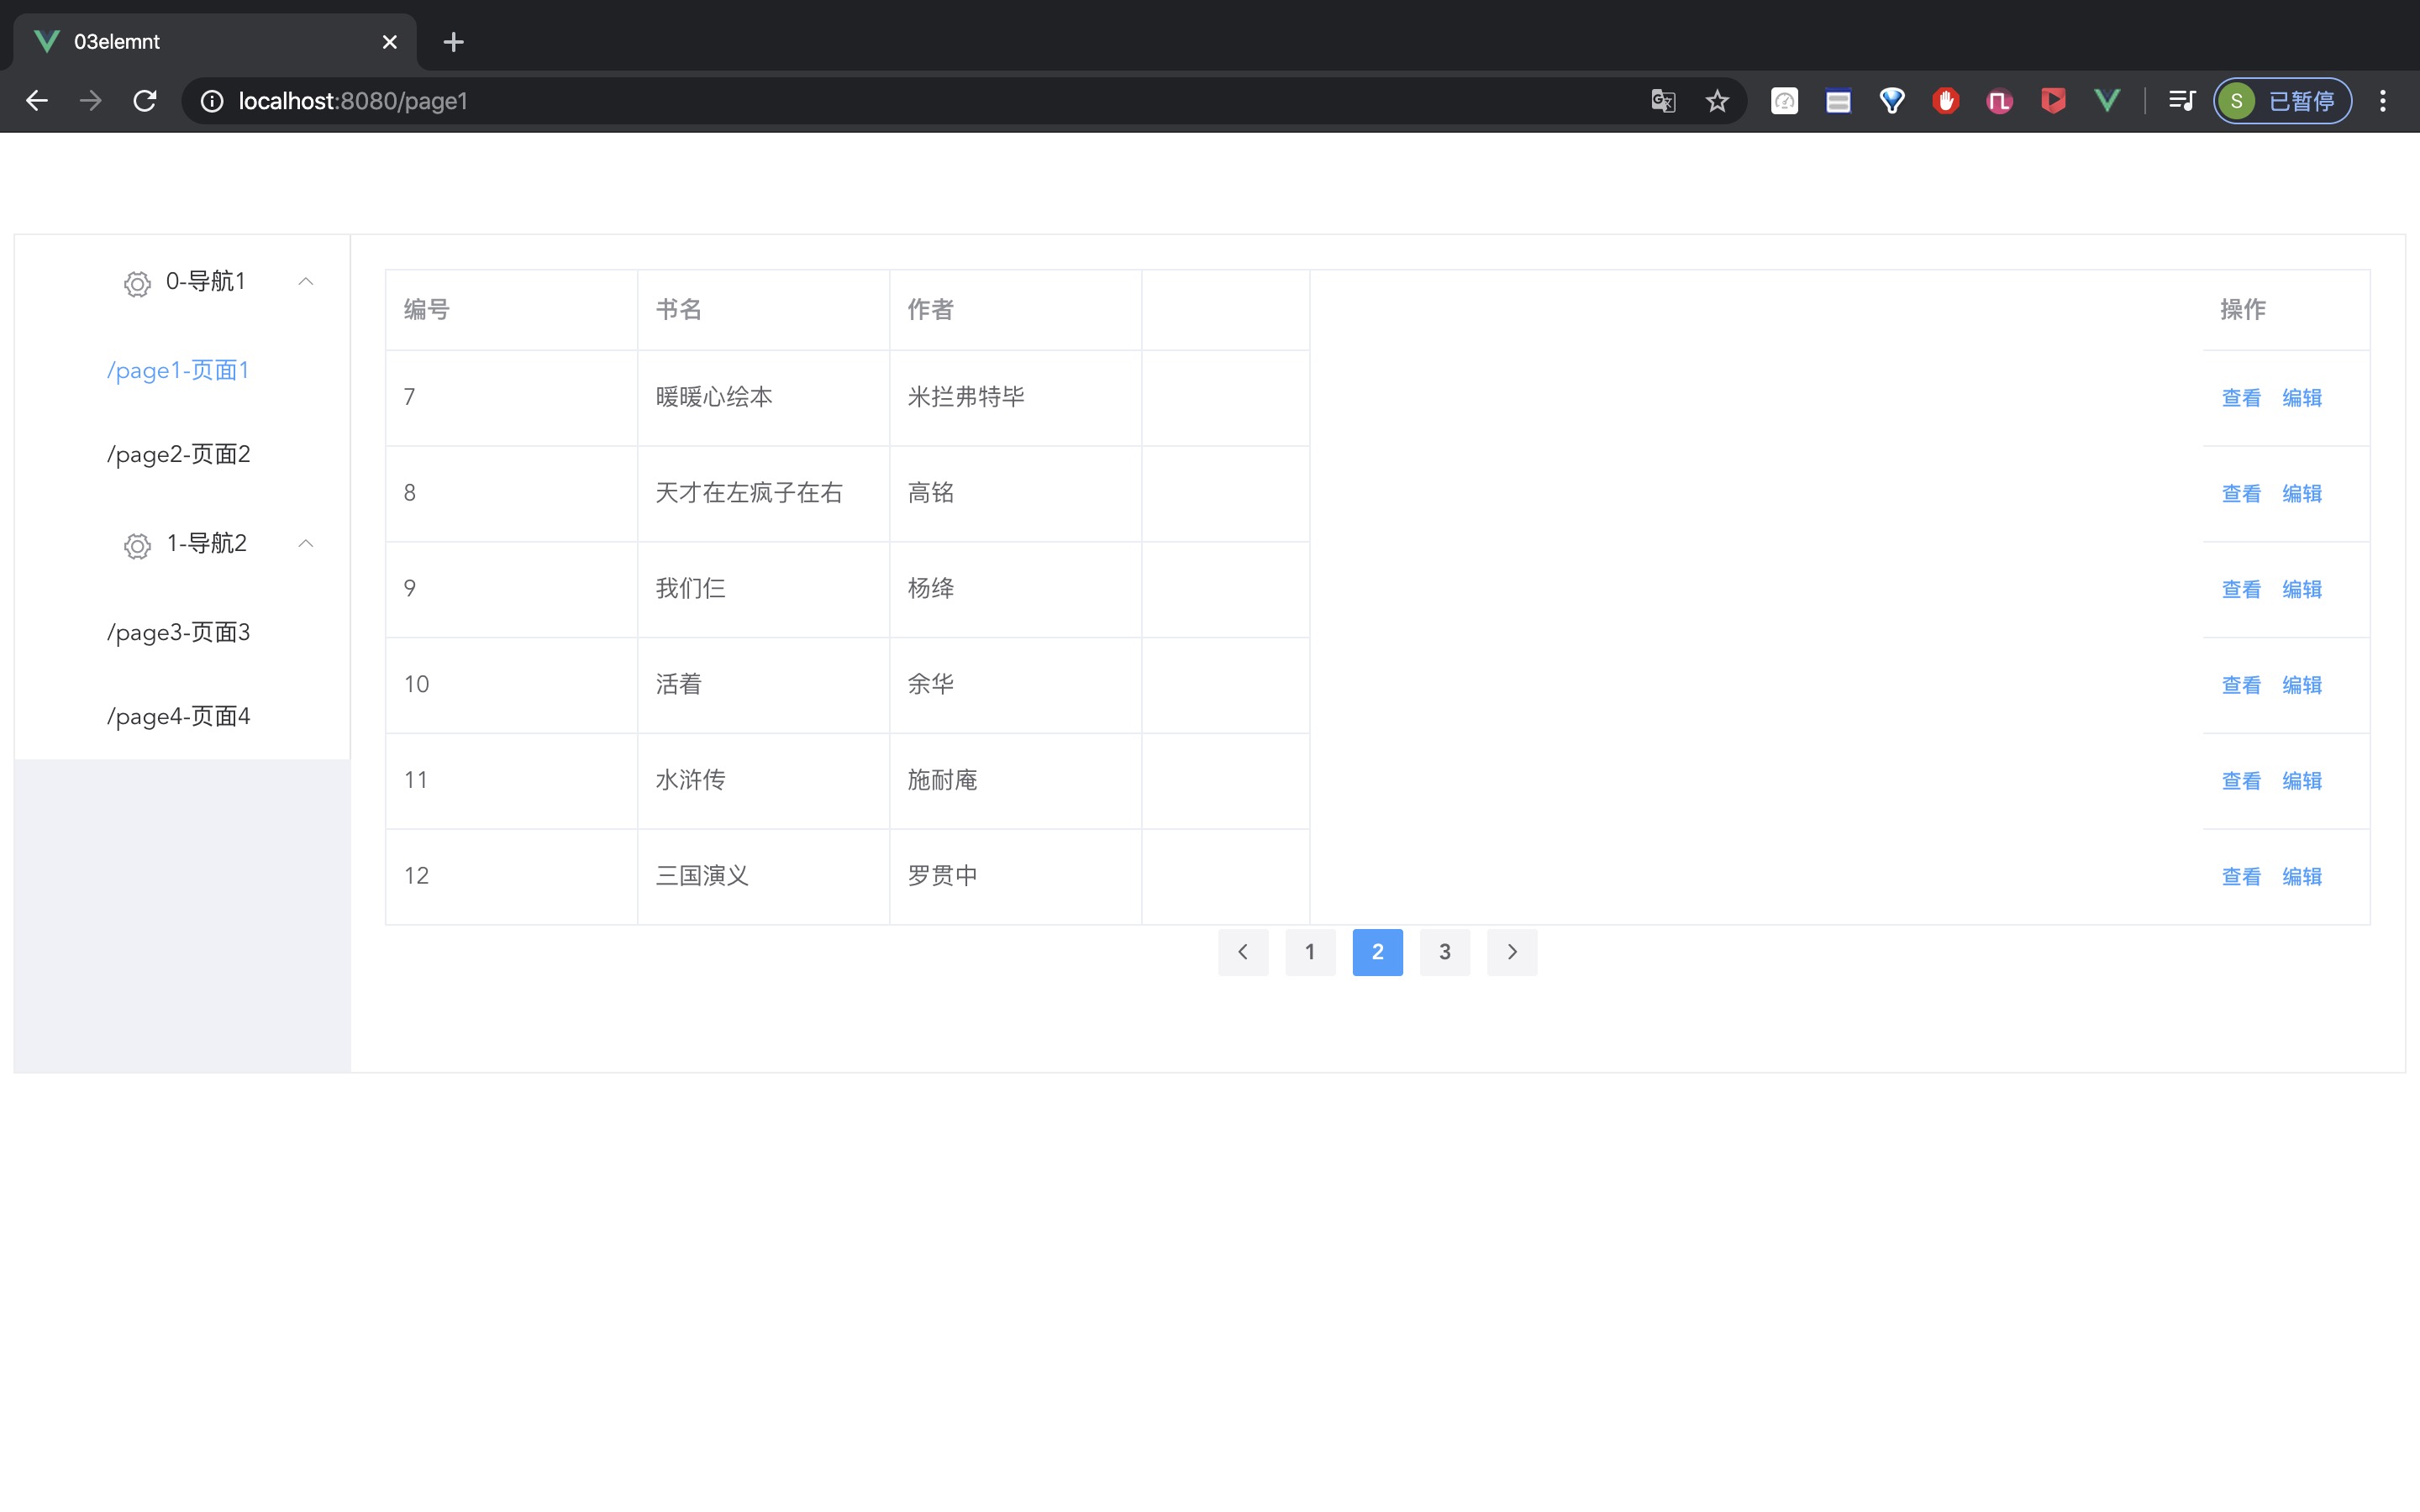
点击翻页
把传过来的对象打印看看,发现就是页面的index
绑测试的数据试试,后面在连后台
1 | clickPage(index){ |
可以正常切换
后端添加分页操作
Spring Boot的Repository把分页也解决了
测试
1 |
|
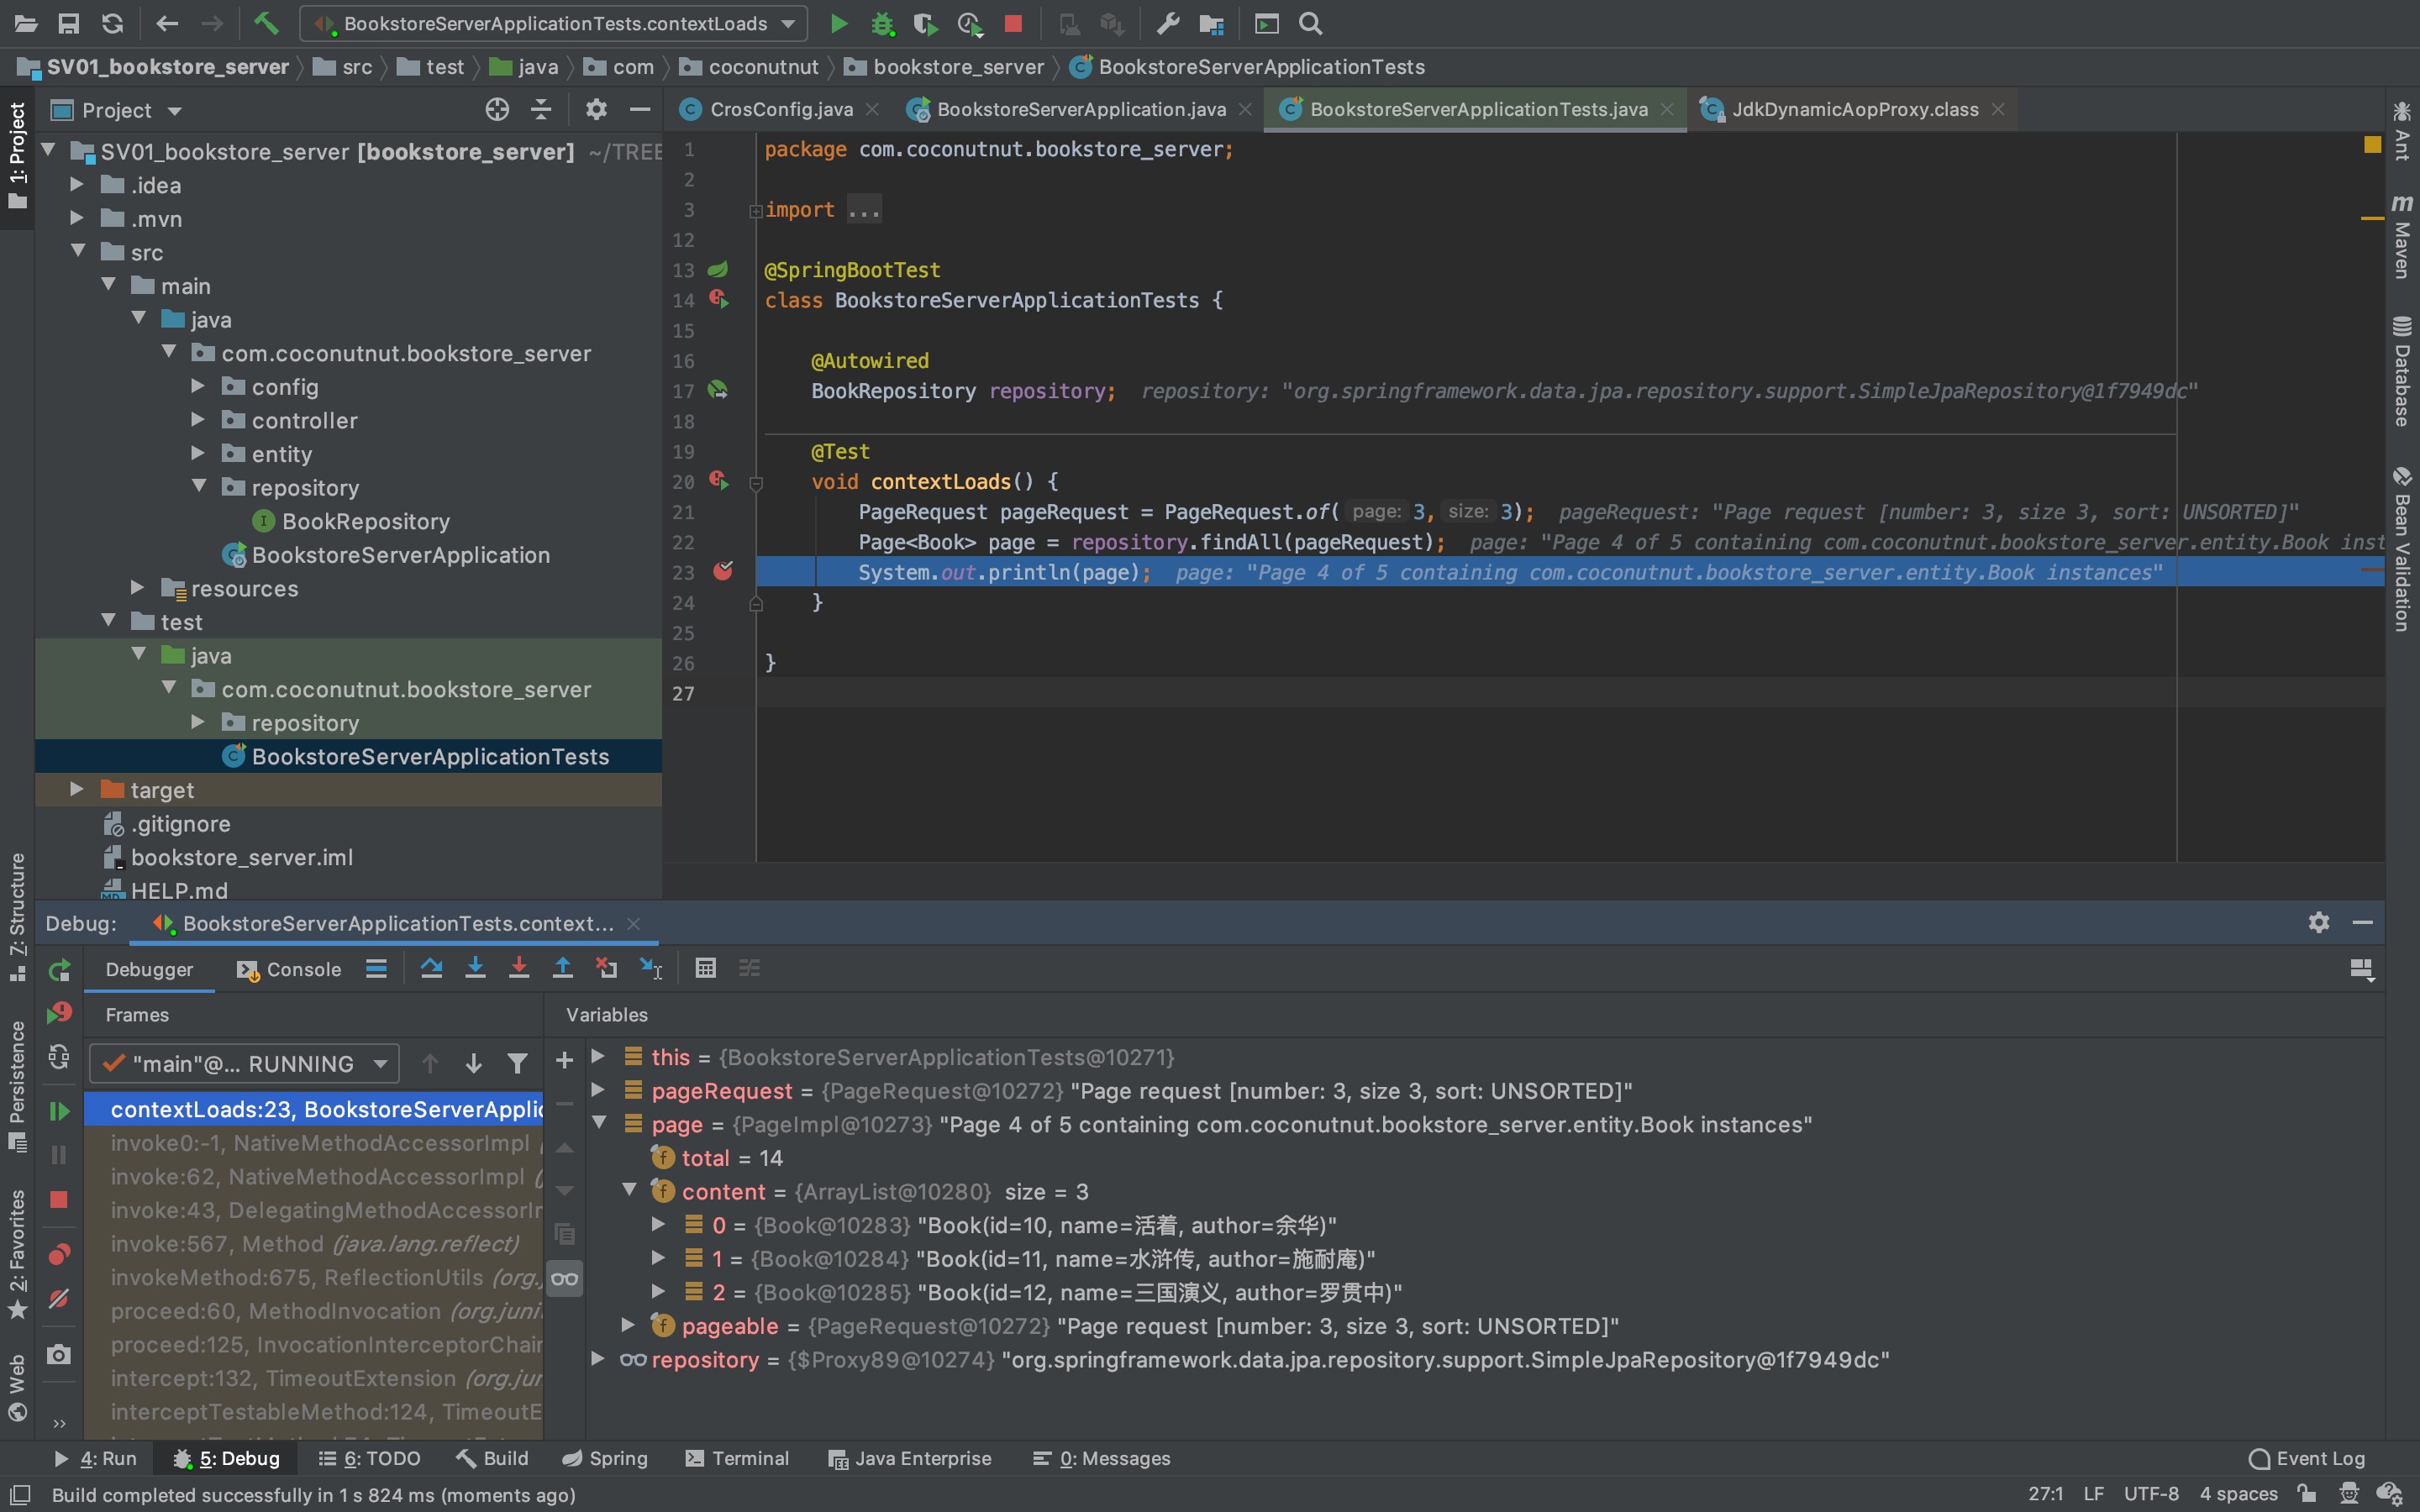
需要的东西都取出来了
直接调方法实现接口就可以了
在controller中,接收参数,调findAll,返回Page
1 |
|

对接
装插件
1 | vue add axios |
axio.get().then()
get里是请求,then里是回调函数
1 | created(){ |
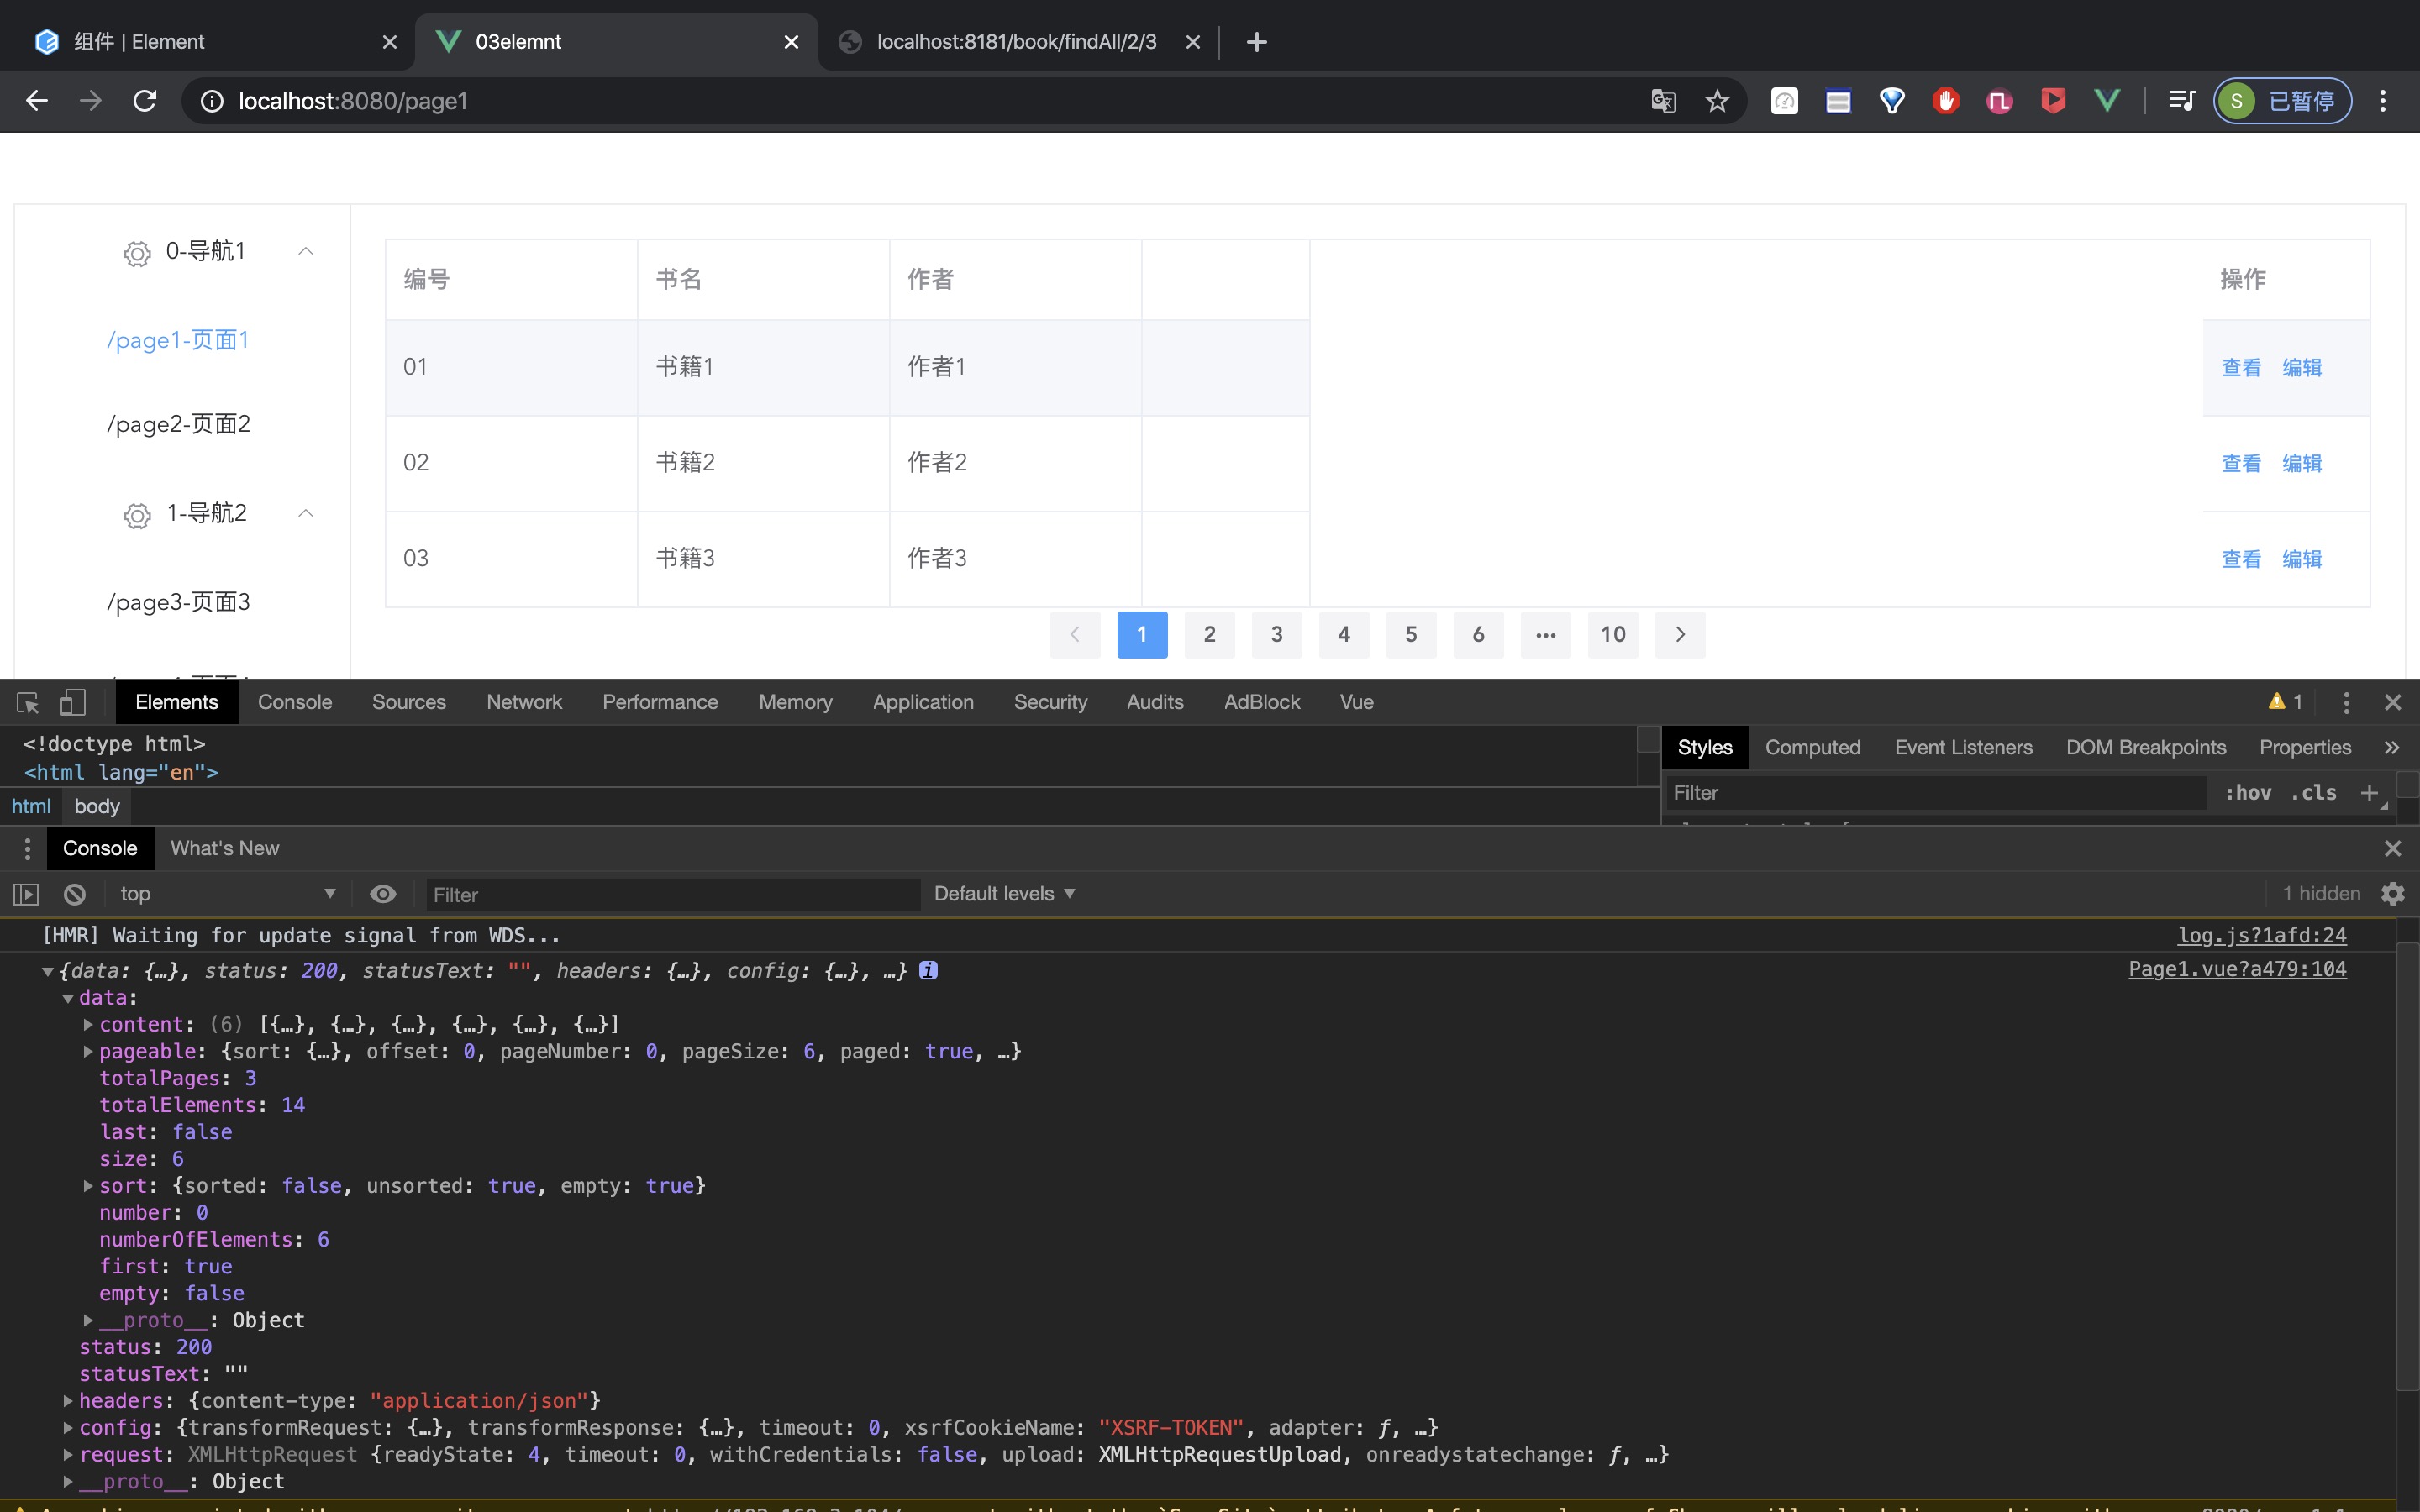
看到数据得到了
Page中data.content部分就是书籍数据,赋值即可
1 | data() { |
1 | <el-pagination |
并且修改点击事件绑定的函数
1 | clickPage(index){ |
就可以点击翻页了