https://www.bilibili.com/video/av85793766?p=1
Vue工程 创建 vue ui创建工程,导入Idea
启动:npm run serve
引入页面&配置路径 router/index.js中引入.vue
Book.vue template就是html,script就是js,style就是css
1
2
3
4
5
6
7
8
9
10
11
12
13
14
15
16
17
18
19
20
21
22
23
24
25
26
27
28
29
30
31
32
33
34
35
36
37
38
39
40
41
42
43
44
45
46
47
48
49
<template> <div id ="showcase" > <table > <tr > <td > 编号</td > <td > 名称</td > <td > 作者</td > </tr > <tr v-for ="item in books" > <td > {{item.id}}</td > <td > {{item.name}}</td > <td > {{item.author}}</td > </tr > </table > {{msg}} </div > </template> <script > export default { name : "Book" , data ( return { msg :'2019999999999999' , books :[ { id : 20200001 , name : '病毒星球' , author : '卡尔·齐默' }, { id :20200002 , name : '洛基启示录' , author : '乔安妮·M·哈里斯' }, { id :20200003 , name : '增强人类' , author : '海伦·帕帕扬尼斯' } ] } } } </script > <style scoped > </style >
vue可以动态加载,改完代码不需要重启,直接访问即可
Spring工程 创建 Idea中Spring Initializr默认模版创建
配置文件 这里没有用application.properties,删掉
数据库建表 用提供的book.sql建book表
Book 和book表对应,加@Entity后,根据类名和表名对应绑定
1
2
3
4
5
6
7
8
@Entity @Data public class Book @Id private Integer id; private String name; private String author; }
BookRepository 继承JpaRepository,<>中第一个是实体类,第二个是主键类型
1
2
public interface BookRepository extends JpaRepository <Book ,Integer > }
测试BookRepository 然后测试一下
1
2
3
4
5
6
7
8
9
10
11
12
@SpringBootTest class BookRepositoryTest @Autowired private BookRepository bookRepository; @Test void findAll () System.out.println(bookRepository.findAll()); } }
试一下
每写一个repository先测一下,保证没问题再继续写controller
BookHandler 配上对应的注解和mapping
1
2
3
4
5
6
7
8
9
10
11
12
13
@RestController @RequestMapping("/book") public class BookHandler @Autowired private BookRepository bookRepository; @GetMapping("/findAll") public List<Book> findAll () return bookRepository.findAll(); } }
测试 运行BookstoreServerApplication启动类
对接 vue中ajax请求用axios组件
刷新页面时读取数据,可以写到初始化函数中,比如这样:
1
2
3
4
5
6
7
8
9
10
<script> export default { created ( alert(123 ) axios.get('http://localhost:8181/book/findAll/' ).then(function (resp ) console .log(resp) }) } } </script>
刷新,看浏览器的控制台
1
2
3
4
5
6
7
8
9
10
11
12
13
14
@Configuration public class CrosConfig implements WebMvcConfigurer @Override public void addCorsMappings (CorsRegistry registry) registry.addMapping("/**" ) .allowedOrigins("*" ) .allowedMethods("GET" , "HEAD" , "POST" , "PUT" , "DELETE" , "OPTIONS" ) .allowCredentials(true ) .maxAge(3600 ) .allowedHeaders("*" ); } }
重启,再访问就好了
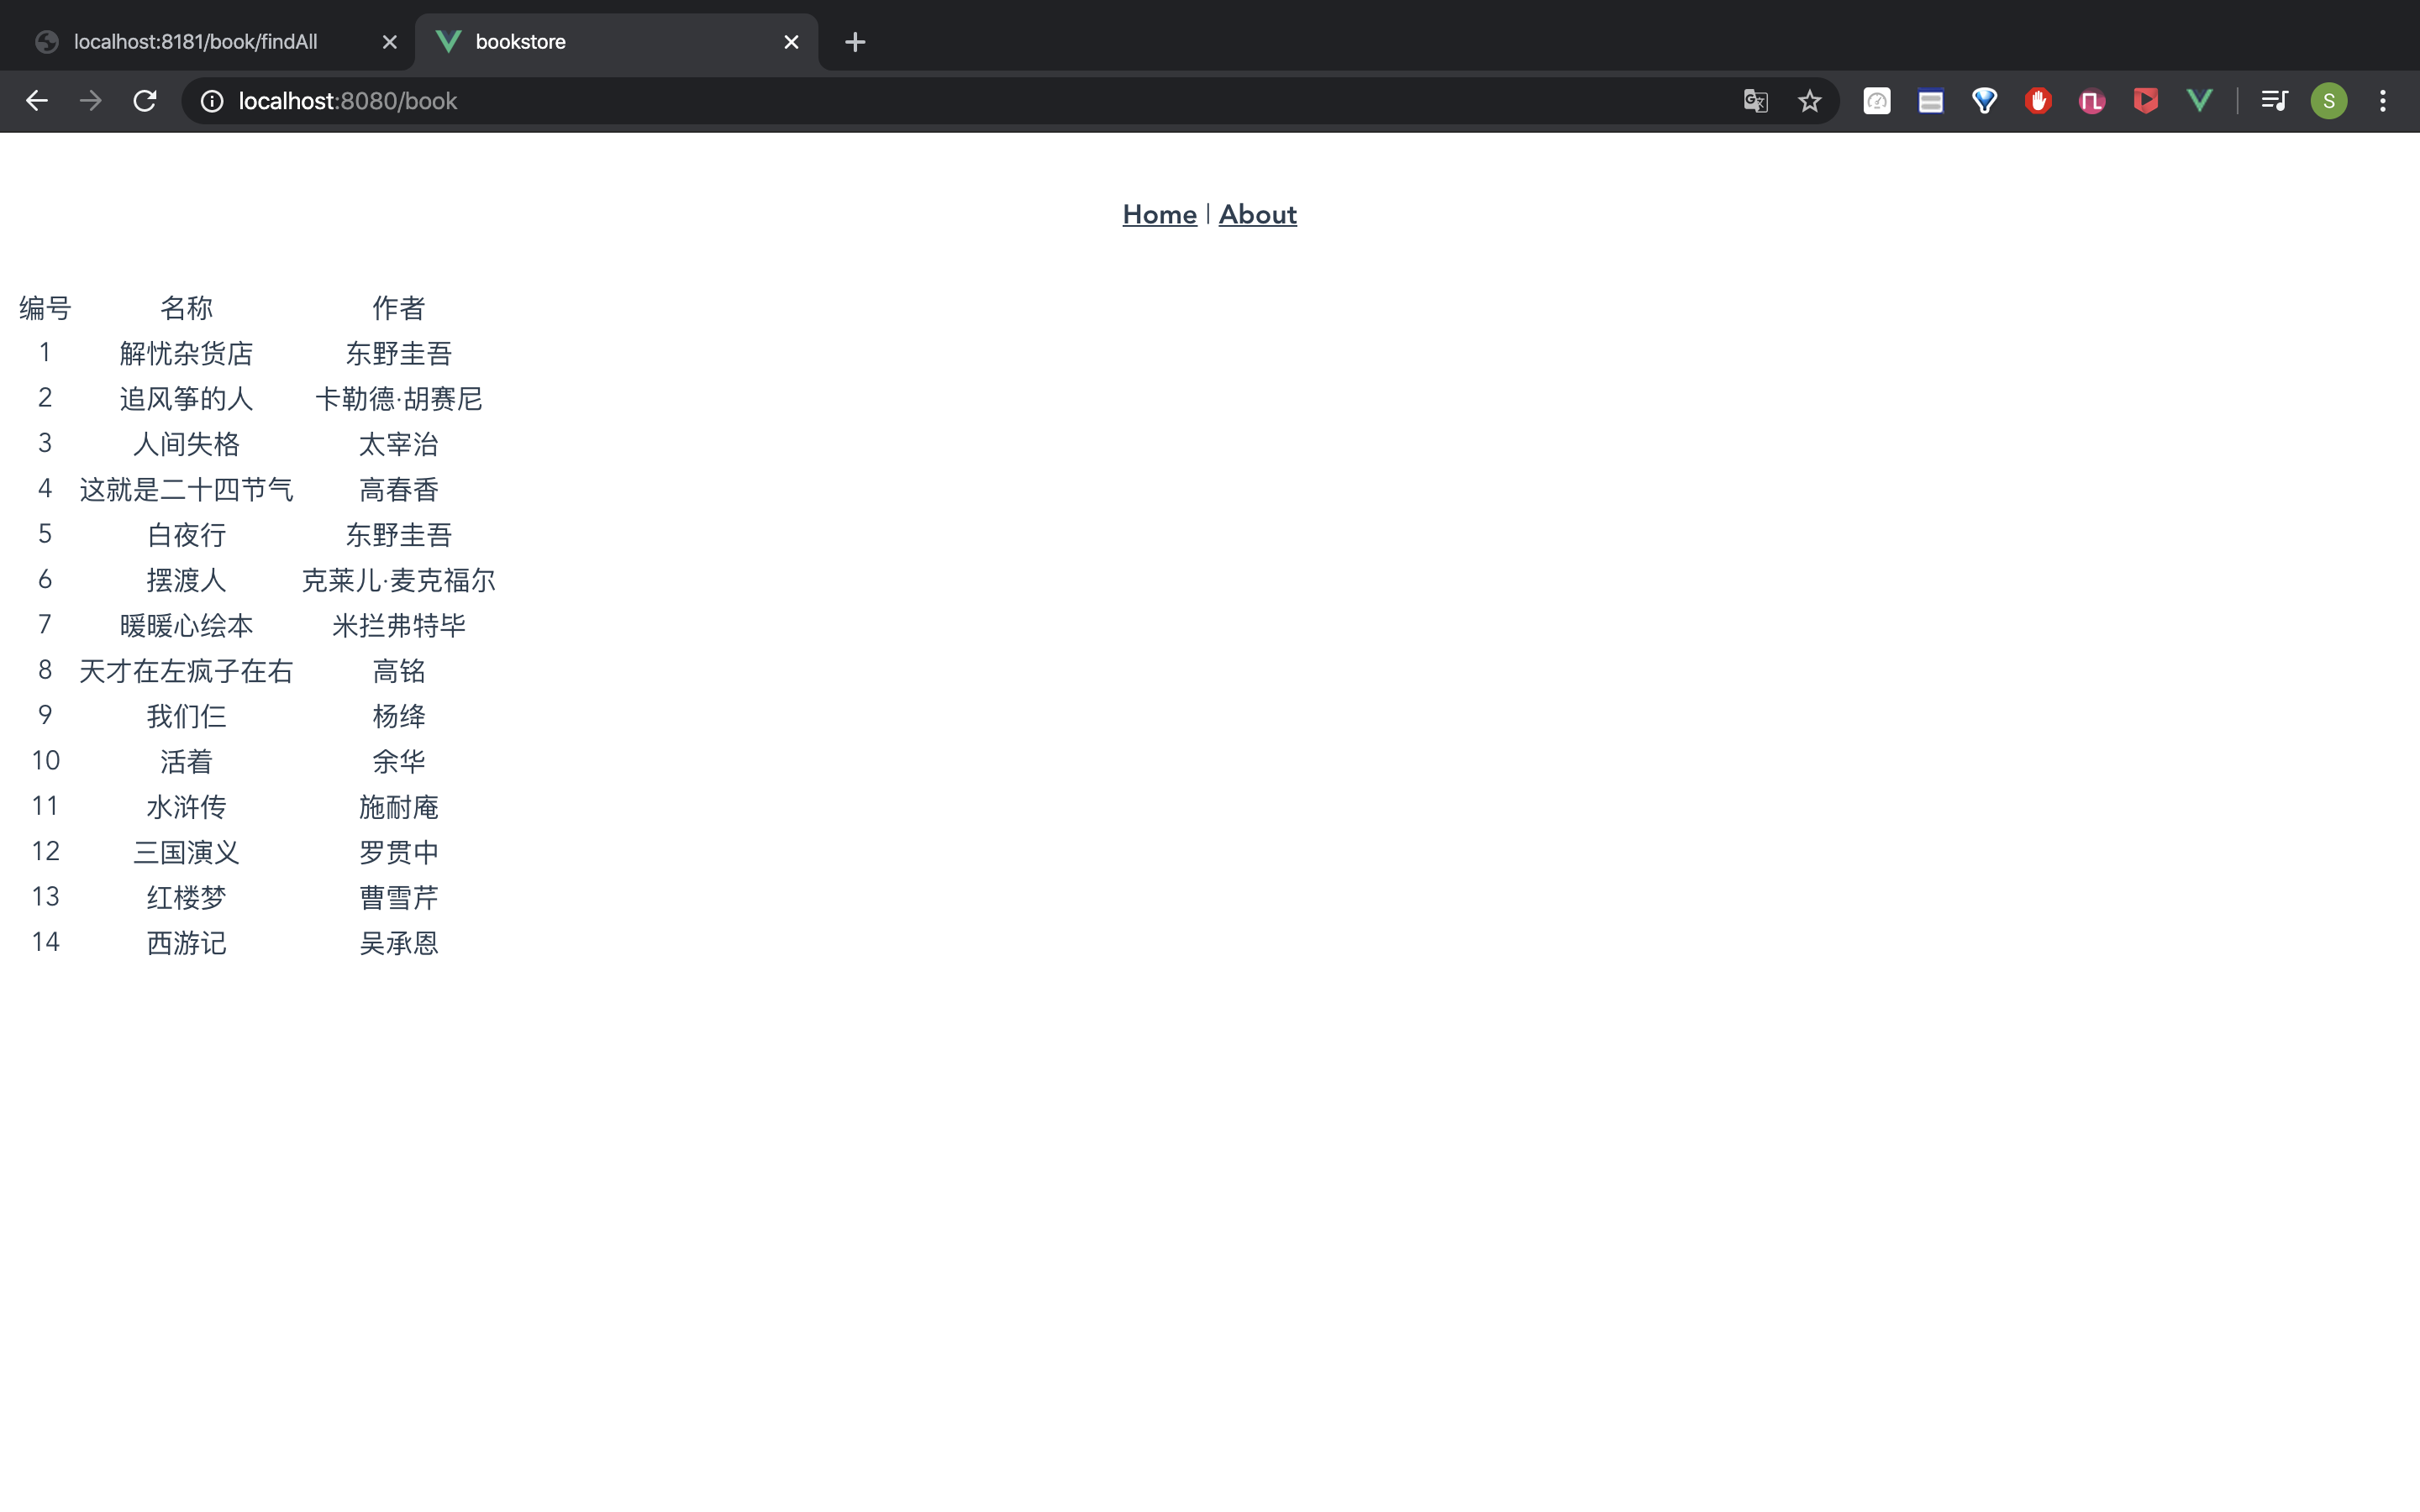
1
2
3
4
5
6
7
8
9
10
11
12
13
14
15
16
17
18
19
20
21
22
23
24
25
26
27
28
29
30
31
32
33
34
35
36
37
<template> <div id="showcase" > <table> <tr> <td>编号</td> <td>名称</td> <td>作者</td> </tr> <tr v-for ="item in books" > <td>{{item.id}}</td> <td>{{item.name}}</td> <td>{{item.author}}</td> </tr> </table> </div> </template> <script> export default { name: "Book" , data(){ return { books:[] } }, created() { const _this = this axios.get('http://localhost:8181/book/findAll' ).then(function (resp){ _this.books = resp.data }) } } </script> <style scoped> </style>
这样前后端就连上了
总结
写前端,用加数据测试
写后端,保证接口能访问
调后端(后端解决跨域问题)